In this article I present how I build my private Azure pipeline agent in Azure based on Packer script provided by Microsoft that it’s use for build the Hosted Azure pipeline agent.
For build my private agent I do that in 4 steps:
- Create an image (VHD format) with Packer script provided by Microsoft
- Use this VHD for create a custom VM image with Terraform
- Provision a new Azure DevOps Pipeline Agent VM with Terraform
- Install and Configure the Azure DevOps Pipeline Agent with Ansible
Create an Azure pipeline agent image VHD with the Packer Microsoft script
Requirements
The first step is to install Packer from HashiCorp from the download page.
Then, get the Packer script code provided by Microsoft for build a VM agent with all software thats is in the hosted agent available in the GitHub repository.
Azure infrastructure
Before execute this Packer script we need to prepare the Azure infrastructure with:
- Create a Azure storage Account wich will contain the vhd file generated by Packer.
- Create (or use an existing) an Azure AD service principal that have authorizations for manage (create, update, delete) Azure resources.
We can create this service principal manually from the Azure portal or by using the Azure cli 2.0
This service principal must be contributor role on the current subscription, because apart from the storage account that will be modified, Packer will also create a temporary resource group (with one VM) in this subscription.
Configure Packer connection
The Packer execution for these scripts require the configuration of connection with Azure and the storage account information. For this we have 3 solutions:
- With variables environments
export ARM_CLIENT_ID=<your service principal Application ID>
export ARM_CLIENT_SECRET=<your service principal secret key>
export ARM_SUBSCRIPTION_ID=<your subscription ID>
export ARM_TENANT_ID=<your service principal tenant ID>
export ARM_RESOURCE_GROUP=<The resource group that contain the storage account>
export ARM_STORAGE_ACCOUNT=<the name of the storage account>
export ARM_RESOURCE_LOCATION=<the location of the storage account>
- With Json file configuration
Another solution is to use external json file for store this configuration, with this content:
{
    "client_id" : "<your service principal Application ID>",
    "client_secret": "<your service principal secret key>",
    "subscription_id": "<your subscription ID>",
    "tenant_id": "<your service principal tenant ID>",
    "resource_group": "<The resource group that contain the storage account>",
    "storage_account": "<the name of the storage account>",
    "location":"<the location of the storage account>"
}
- By using -var arguments
The Last solution consist to use the -var arguments to the Packer cli command.
Execute Packer
Now that all it’s ready with:
- Packer installed
- Get the Packer script of the images
- The Azure infrastructure created
- The configuration applied
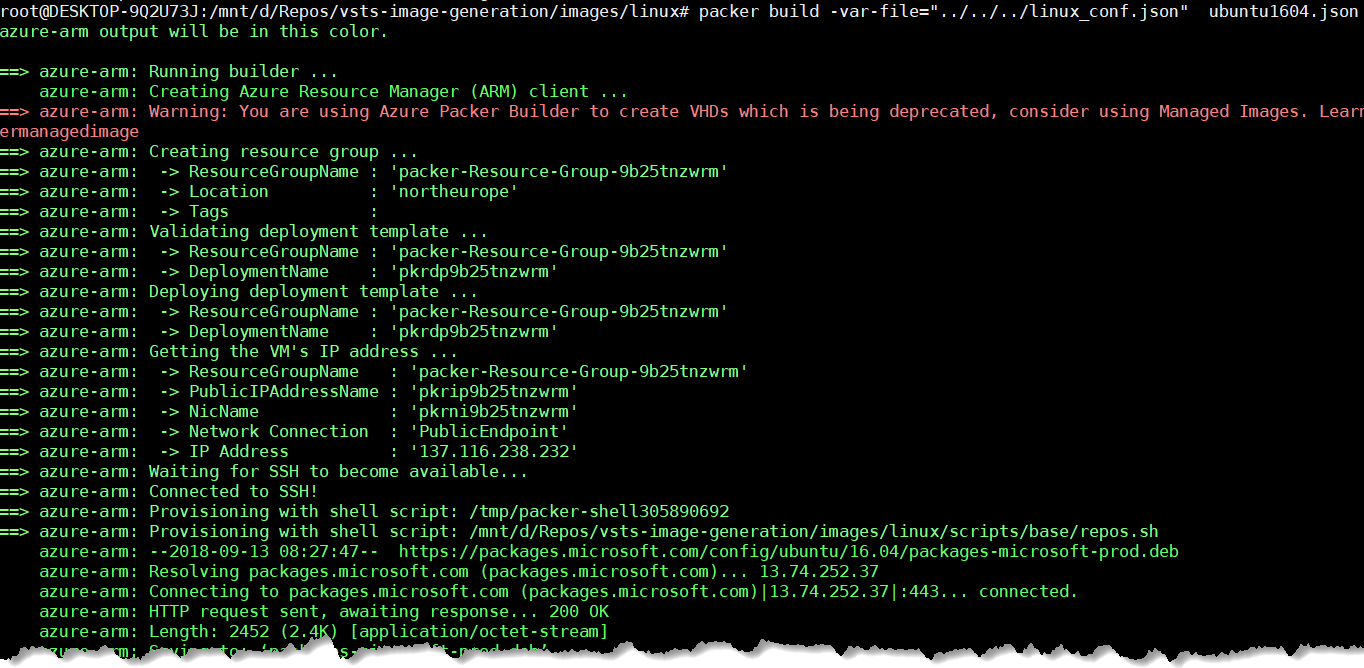
We can execute Packer with the provided scripts
- In the source code , navigate to the images folder, then to the type of images folder to build (e.g. linux)
- Execute the command
packer build ubuntu1604.json
If we use the 2nd solution for the configuration with Json file use the -var-file argument:
packer build -var-file="../../linux_conf.json" ubuntu1604.json
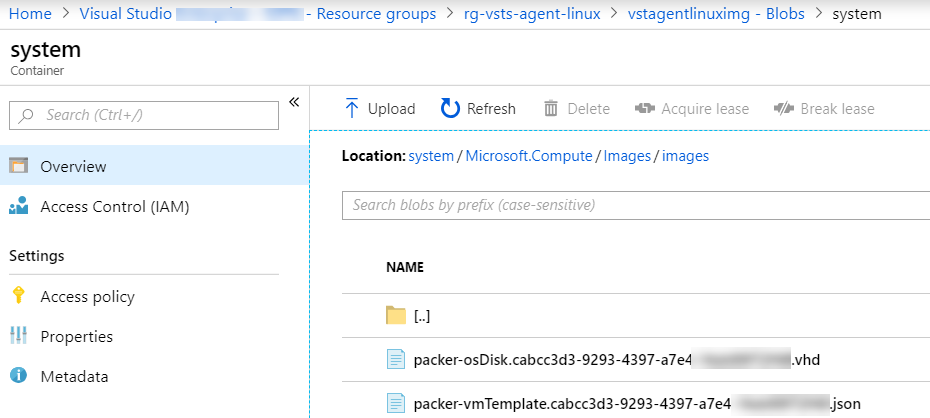
Once the Packer execution is finish we can see in storage account new blob containers:
- system
- images
Inside the image container we have 2 files:
- packer-osDisk.xxxxxxxx.vhd ==> that is the VHD image
- packer-vmTemplate.xxxxxxxxx.json ==> that is the ARM Template sample for create VM based on the created VHD
Create a VM custom image with Terraform
After that the VHD image file is created, the next step is to create an Azure VM custom image witch will be used for provision all agents VM. For create this custom image as Code we use Terraform from HashiCorp that is one of the best Infra as Code tool.
For more documentation on how start with Terraform on Azure, read my blog post here.
My Terraform code in my main.tf is:
provider "azurerm" {
  subscription_id = "<your subscription id>"
  client_id       = "<your client id>"
  client_secret   = "<your client secret>"
  tenant_id       = "<your tenant id>"
}

resource "azurerm_image" "vsts-linux" {
  name = "vsts-agent-linux"
  location = "North Europe"
  resource_group_name = "rg-vsts-agent-linux"

  os_disk {
    os_type = "Linux"
    os_state = "Generalized"
    blob_uri = "https://${var.storageaccountname}.blob.core.windows.net/system/Microsoft.Compute/Images/images/${var.paker_vhd_name}.vhd"
    size_gb = 128
  }
}
After this code execution with the command terraform plan and terraform apply we can see the VM image in the resource group.
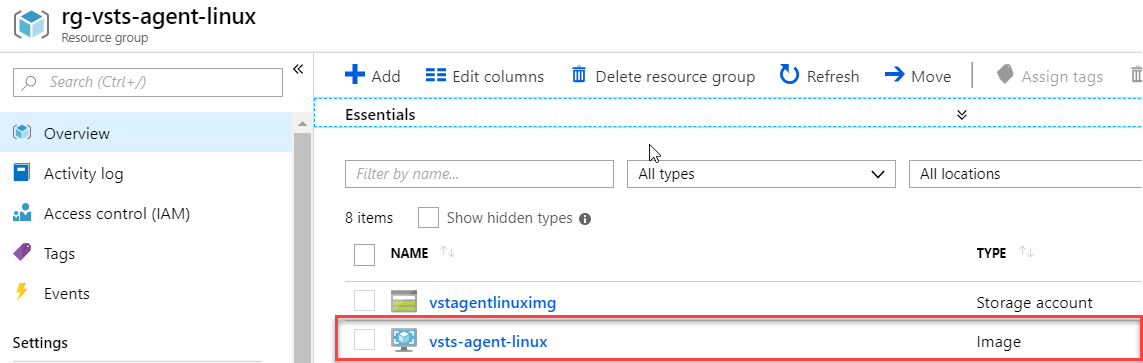
With this image we can now build our the VM agent for the Azure Pipeline process.
Provision the Azure DevOps Pipeline Agent VM with Terraform
Based on the created VM image, we will provision the VM agent with Terraform.
The Terraform code is classic for build Linux Azure VM, see a sample here, I just adapt it for use the created custom image.
I add a data resource azurerm_image for get the properties of this custom image:
data "azurerm_image" "custom" {
  name                = "vsts-agent-linux"
  resource_group_name = "${var.resource_group}"
}
And in azurerm_virtual_machine resource I use the id of this data in the storage_image_reference block.
resource "azurerm_virtual_machine" "vm" {
  name                  = "${var.project_name}vm"
  location              = "${var.location}"
  resource_group_name   = "${var.resource_group}"
  vm_size               = "Standard_DS2_v2"
  network_interface_ids = ["${azurerm_network_interface.nic.id}"]

  storage_image_reference {
      id = "${data.azurerm_image.custom.id}"
  }

  storage_os_disk {
    name              = "${var.project_name}-osdisk"
    managed_disk_type = "Standard_LRS"
    caching           = "ReadWrite"
    create_option     = "FromImage"
  }

  storage_data_disk {
    name              = "${var.project_name}-datadisk"
    managed_disk_id   = "${azurerm_managed_disk.datadisk.id}"
    managed_disk_type = "Standard_LRS"
    disk_size_gb      = "1023"
    create_option     = "Attach"
    lun               = 0
  }

.......
The complete code of this script is available in my Github.
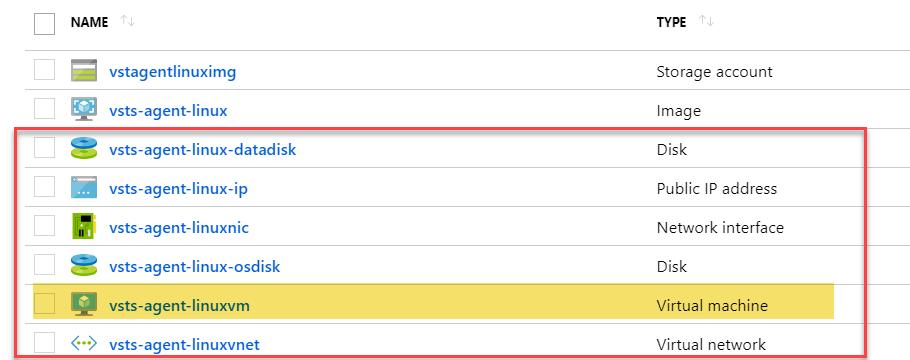
At the end of this execution we can this the builded VM and all dependencies in the resources group.
The last step consist to install the Azure DevOps Pipeline Agent (that its not included in the Packer builder), that will be performed with Ansible.
Install and Configure the Azure DevOps pipeline agent with Ansible
Ansible, is tool for Configuration As Code, will allow us to install the Azure DevOps Pipeline Agent remotely, simply, and fully automated.
For this I used an existing Ansible role in the Ansible Galaxy here, I cloned the related GitHub repository and:
- I updated some tasks
- I created a playbook.yml for call this role.
- I added an inventory file with the host of my VM agent
So my final role with playbook and inventory is in my github here.
This Ansible role :
- create directories for the agent and work
- download the agent from the Microsoft repository
- install the agent
- configure and register it
- Run the agent as service
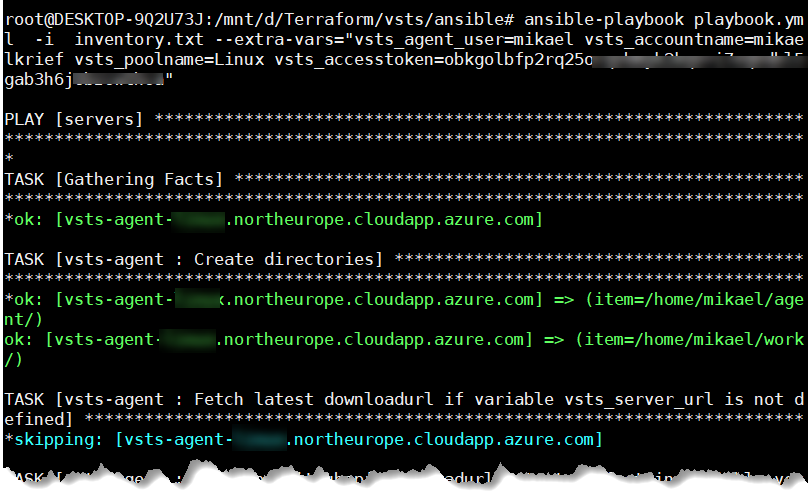
For execute my playbook with this role I executed this command:
ansible-playbook playbook.yml -i inventory.txt --extra-vars="vsts_agent_user=<vm username> vsts_accountname=<vsts account name> vsts_poolname=<vsts agent pool> vsts_accesstoken=<vsts token>"
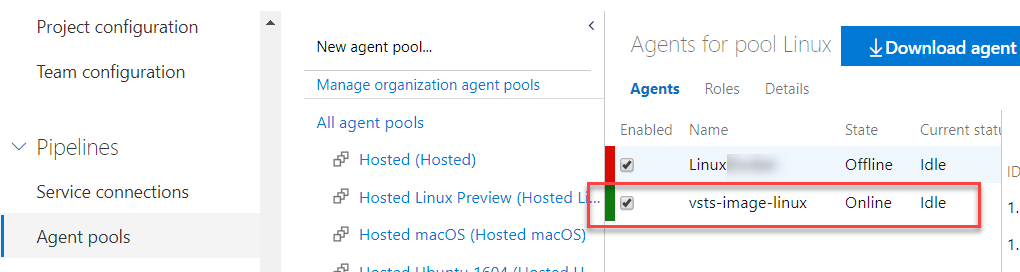
After the execution I see this new Agent registered in my agent pool on my Azure DevOps.
I can also stop and unregistered the Agent service with the command:
ansible-playbook playbook.yml -i inventory.txt --extra-vars="vsts_agent_user=<vm username> vsts_accountname=<vsts account name> vsts_poolname=<vsts agent pool> vsts_accesstoken=<vsts token> vsts_remove=true" -t unconfig
And that’s it, that’s all. !!!
So we see how with the same Microsoft Packer scripts, which are used to build Hosted agents, we can create our private agents using Terraform and Ansible.
All scripts are on my GitHub.
Some resources
- Packer with azure builder documentation page.
- Terraform azurerm_image documentation.
- Terraform azurerm_virtual_machine documentation.
Comments