This post is the first of a large series of blog posts on DevOps on Azure, I will expose my current experience for the implementation of a DevOps process with Terraform, Ansible, VSTS, Inspec, Jenkins, …..
The objective of this series is not to rewrite existing documentation, posts, articles, … but it will be a “cookbook” type series with posts that will expose real uses cases with best practice of use of these tools in enterprises.
To start, I’ll talk about Terraform and how to use it to provision resources in Azure (also valid for other cloud providers).
Terrafom from HashiCorp is Infrastructure As code tool that allows to provision resources in Azure with a very simple language (HCL).
Advantages of Terraform are:
- It is open source with a large active community.
- It’s Multi Cloud provider (Azure, AWS, OpenStack, …..)
- It’s multi-platforms: work on Linux, Windows, Mac OS, …
- It allows to preview the changes that it will apply before its application (with the plan command).
- It runs in command line, so it can be integrated in an automated DevOps pipeline.
- The command line tool has some very useful options (which we will see as we go along).
- and many others ….
Installation of Terraform
For download ans install Terraform see the official page here, and this stackoverflow page for set Path on Linux.
You can also execute this shell script directly on your linux for automate the download and installation of Terraform.
wget https://releases.hashicorp.com/terraform/0.11.7/terraform_0.11.7_linux_amd64.zip -O terraform.zip
unzip terraform.zip
mv terraform /home/${USER}/.local/bin/
if [[ “:$PATH:” == *”:$HOME/.local/bin”* ]]; then echo “Your path is correctly set” else PATH=$PATH:/home/${USER}/.local/bin export PATH fi
Thanks to Etienne Deneuve for this script.
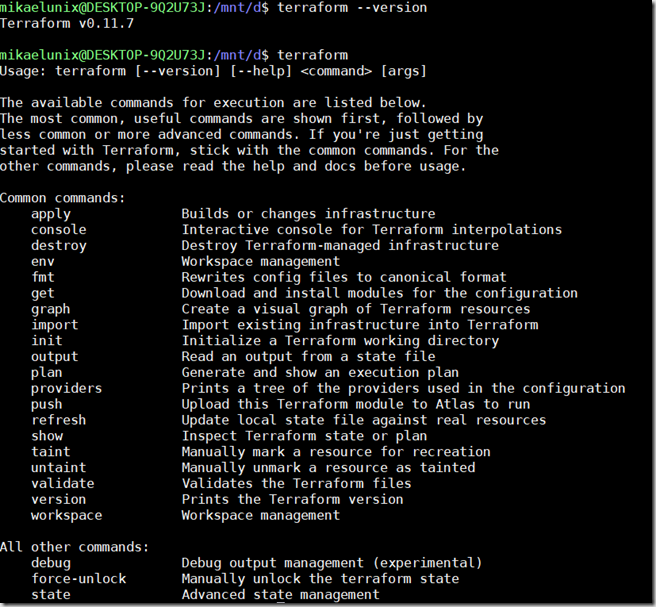
After the installation, you can test your installation of Terraform by executing the command terraform –version for display the version of your terraform, or run the command: terraform for display all command options.
Configuration of the Azure resources access
For authorize Terraform to manage resources on Azure, we need to create a Azure AD service principal that have authorizations for manage (create, update, delete) Azure resources.
For create this service principal manually from the Azure portal:
It’s also possible to create this service principal by using the Azure cli 2.0
Create resources on Azure with Terraform
When Terraform is installed and your Azure Service principal is created, you can start to provision your Azure infrastructure.
For this, in the Terraform code (tf file) you must define the Azurerm provider and then define your Azure resources to provision. The official documentation for the provider and resources is very great and fully : https://www.terraform.io/docs/providers/azurerm/
In the Microsoft documentation you can see the complete Terraform code for provision Linux VM in Azure : https://docs.microsoft.com/en-us/azure/virtual-machines/linux/terraform-create-complete-vm
Other samples of Terraform code for Azure are available in GitHub.
What next…
In this first post, which serves as an introduction to this series, I expose how to start with Terraform on Azure, in the following we will see how to use Terraform with best practices for team, we will talk about :
- Remote backend on Azure Storage
- Modules
- Security with Azure Key Vault
- Terraform folder architecture
- Terraform command cli usage
- Automate Terraform deployment with Visual Studio Team Service ot Jenkins
- …
Comments